Leica BLK3D - Organizing and Exporting Files
Part four of our multi-part series on the Leica BLK3D Imager focuses on organizing and sharing 3D images. Previously, we covered how you can use the Leica BLK3D for taking stereo camera 3D pictures so you can take measurements directly from the image using sophisticated photogrammetry technology.
Besides being a reality capture device, the BLK3D is also a very competent DISTO unit that lets you to take accurate laser measurements. But, once the pictures and data are collected. How do you deal with them? How to you keep them organized and share them with others?

It is all done through the Organiser function via the BLK3D application that comes preloaded on the BLK3D.
Before we dive in, let us clear the air, Organiser is NOT misspelled. Leica products are made in Switzerland, and that is the preferred spelling in Europe.
Now that's is clear, let us get into how you can organize, export, and share files with the Leica BLK3D Imager. Choosing Organiser from the main menu of the BLK3D App displays this screen.
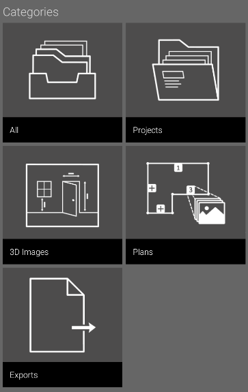
All the Plans and 3D Images are stored in four categories:
- All
- Projects
- 3D Images
- Plans
All the exported files are stored in Exports category folder
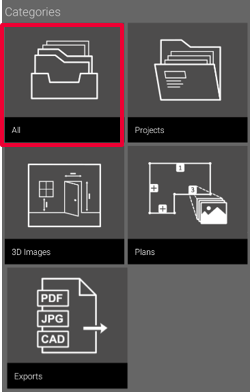
Open the category "All". All the Plans, 3D Images and Projects are stored. Use the "Select" button to select an item. Different actions are available:
- Share
- Move to Project
- Rename
- Tag
- Delete
BLK3D Ograniser - Projects
Open the category "Projects".
Press the "Project" button to create a new Project folder.
Plans and 3D Images can be moved into project folders.

Open the category "Projects".
Press the "Project" button to create a new Project folder.
Plans and 3D Images can be moved into project folders.
BLK3D Ograniser - 3D Images
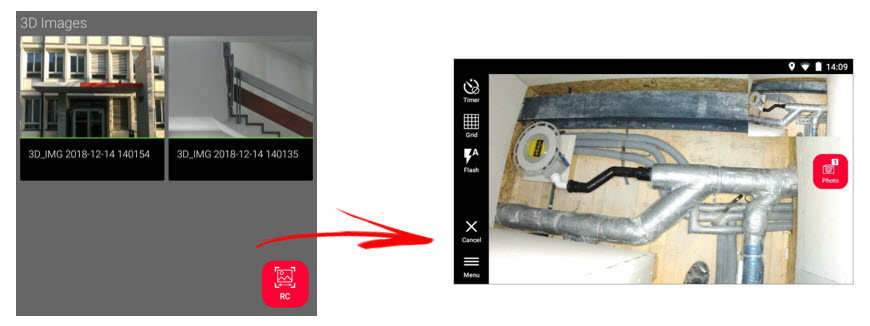
Open the category "3D Images", where all the Reality Capture 3D Images are stored.
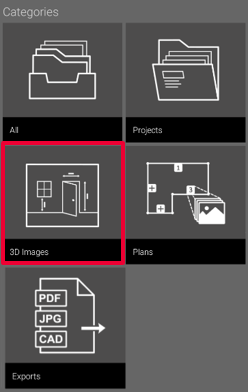
Press "RC" button to switch to Reality Capture to take new 3D Images.
BLK3D Ograniser - Working with Plans
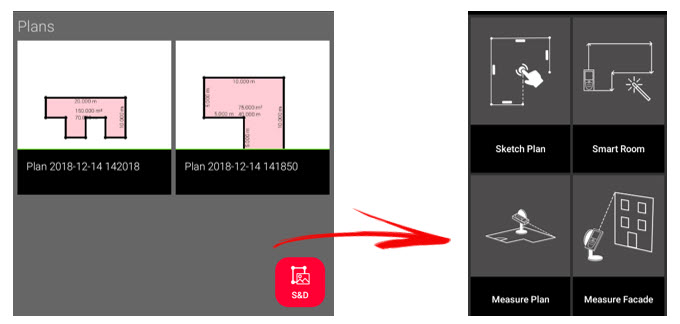
Open the category "Plans". All the Plans, including Plans with 3D Images attached, are stored.
Press "S&D" button to add a new Plan.
BLK3D Ograniser - Exporting Files
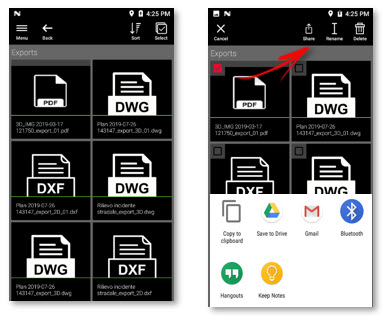
Open the category “Exports” where you can find all the PDF, JPG and CAD exported files
Open, Sort, Rename and Delete any file
Select a file and Share it in the preferred format
How to share files
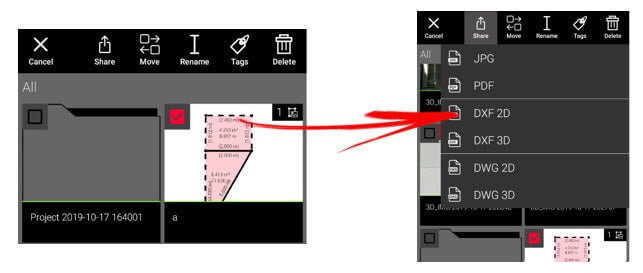
Select the item and press the Share button on the toolbar.
Select one of the available exports format.
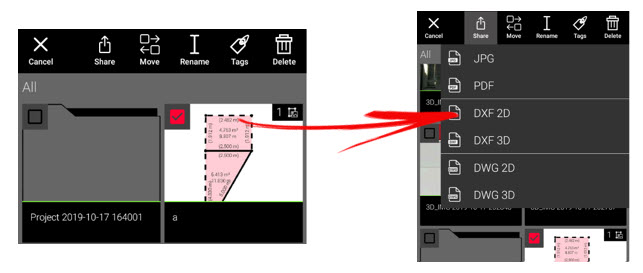
3D Images can be exported in the following formats:
- JPG
Plans can be exported in the following formats:
- JPG
- DXF 2D
- DXF 3D
- DWG 2D
- DWG 3D
Icon Status When Processing Files
When the BLK3D Imager is used for Stero 3D Images, you will notice a small checkbox in the upper right hand side of the screen. This indicates if the picture has been properly processed as either a single-shot or multi-shot image.
3D images processing status is shown on the thumbnail:
- Single shot: single green mark
- Multi-shot: double green mark
- Failed multi-shot: red mark and green one
- No marks: 3D image not processed yet
GPS Handling
GPS location for each 3D image in PDF report
Click on the link to open Google Maps
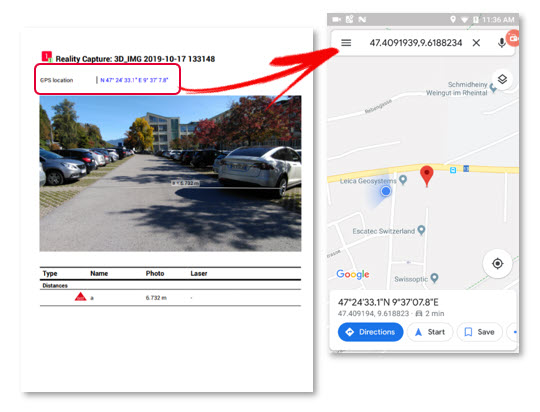
Image Group (New Feature)
New to the latest BLK3D firmware update, v. Image Group functionality is for 3rd part photogrammetry applications (i.e. Agisoft Metashape Professional) are supported by the BLK3D. Please note, the Leica Image is NOT able to process image groups locally on the device. It simply provides a way to collect image groups and keep them organized for external applications.
Conclusion
Again the Leica BLK3D shows off exactly how innovative it is. Besides the built-in DISTO and Reality Capture functions, the powerful onboard Organiser Application allows users to easily organize, export, and share images with others. But, don't be intimidated by all of this technology. The BLK3D is very easy to learn and it intuitively functions like a typical smartphone. Try it yourself and capture jobsite data like a pro in record time.
Related articles:
Part 1: How to Perform Reality Capture on a Leica BLK3D Imager
Part 2: How to Laser Measure with a Leica BLK3D
Part 3: How to Sketch Floorplans on a Leica BLK3D
What Other Software Do I Need for a Leica BLK3D Imager?
No comments








0 comments